How to install +
How to install -
Windows
If you work on Windows you can use Clicktrace installer for Windows.
Linux/Mac
Clicktrace is a Java program (Java 6 or higher required), so you can run it wherever Java Runtime Environment (JRE) is installed.
To run it on Linux or Mac just download the newest zip archive and unpack it. Clicktrace is ready to run. Just double-click "clicktrace.jar" file.
For Mac users: if on Clicktrace startup you get "Unable to register JNativeHook" message, then enable Clicktrace to take shots of your screen.
How to use +
How to use -
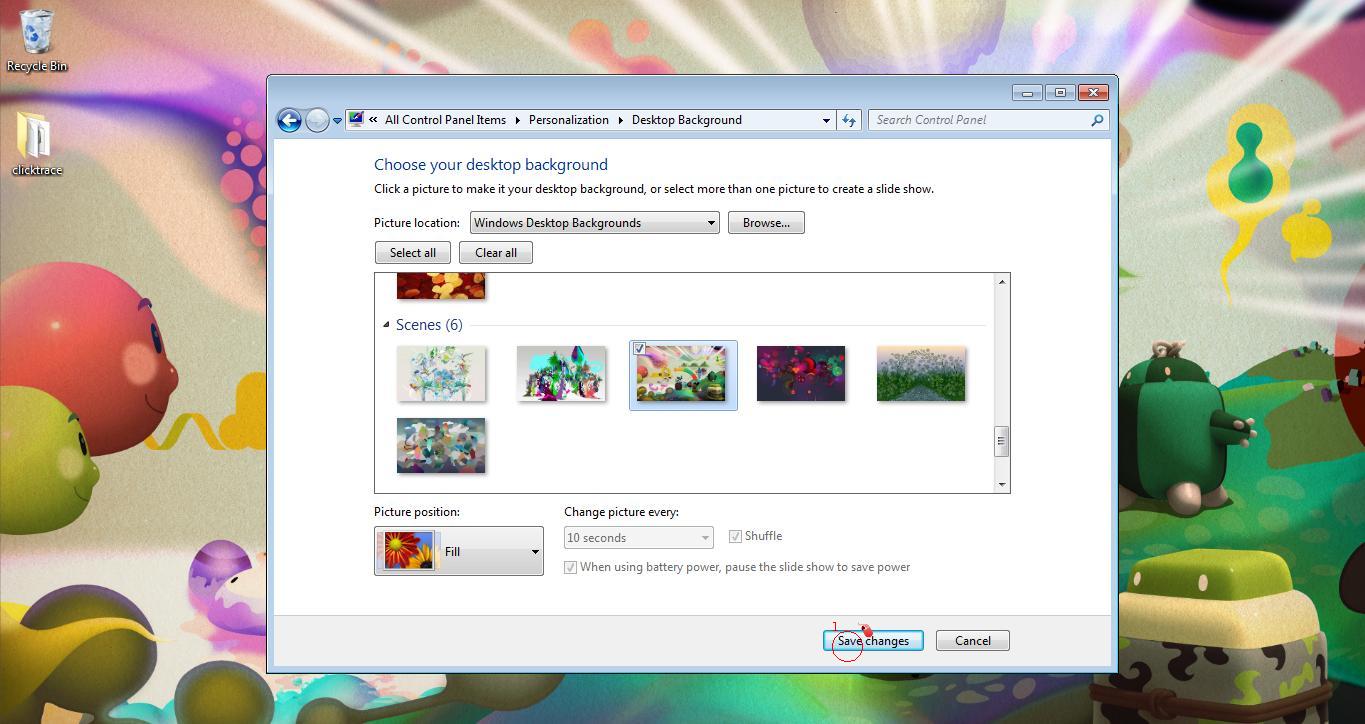
As an example we will create a tutorial how to change desktop background on Windows 7.
If you installed Clicktrace on Windows using installer, you can select Clicktrace from Start Menu. Otherwise open the folder where you downloaded Clicktrace and just double-click the "clicktrace.jar" file.
Remember that Clicktrace needs Java (version 6 or higher) installed on your computer.
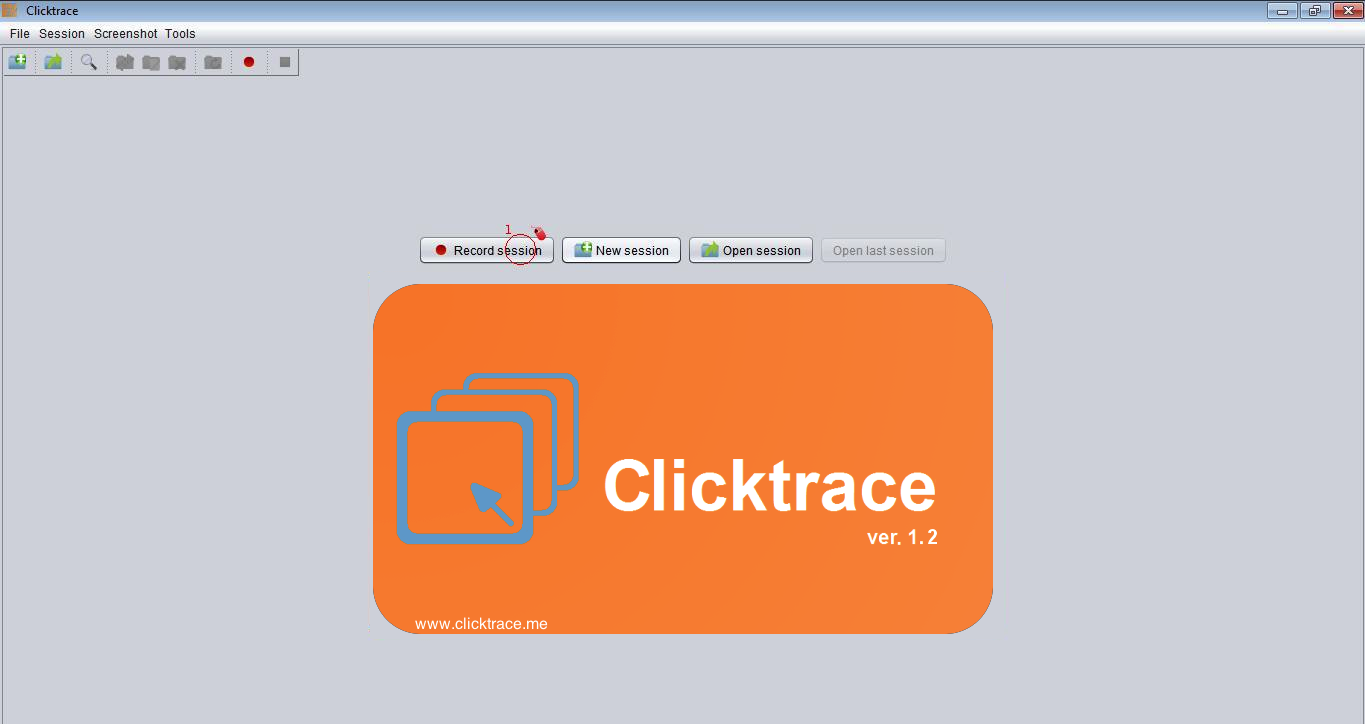
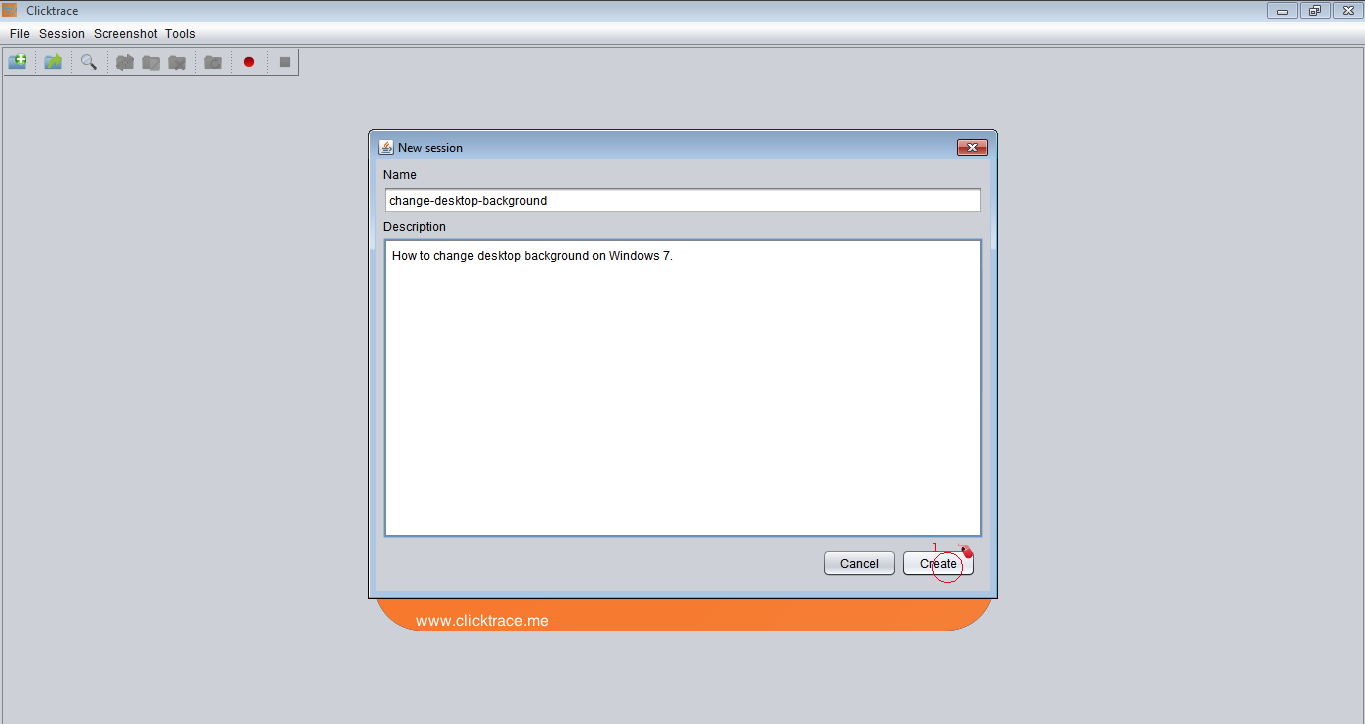
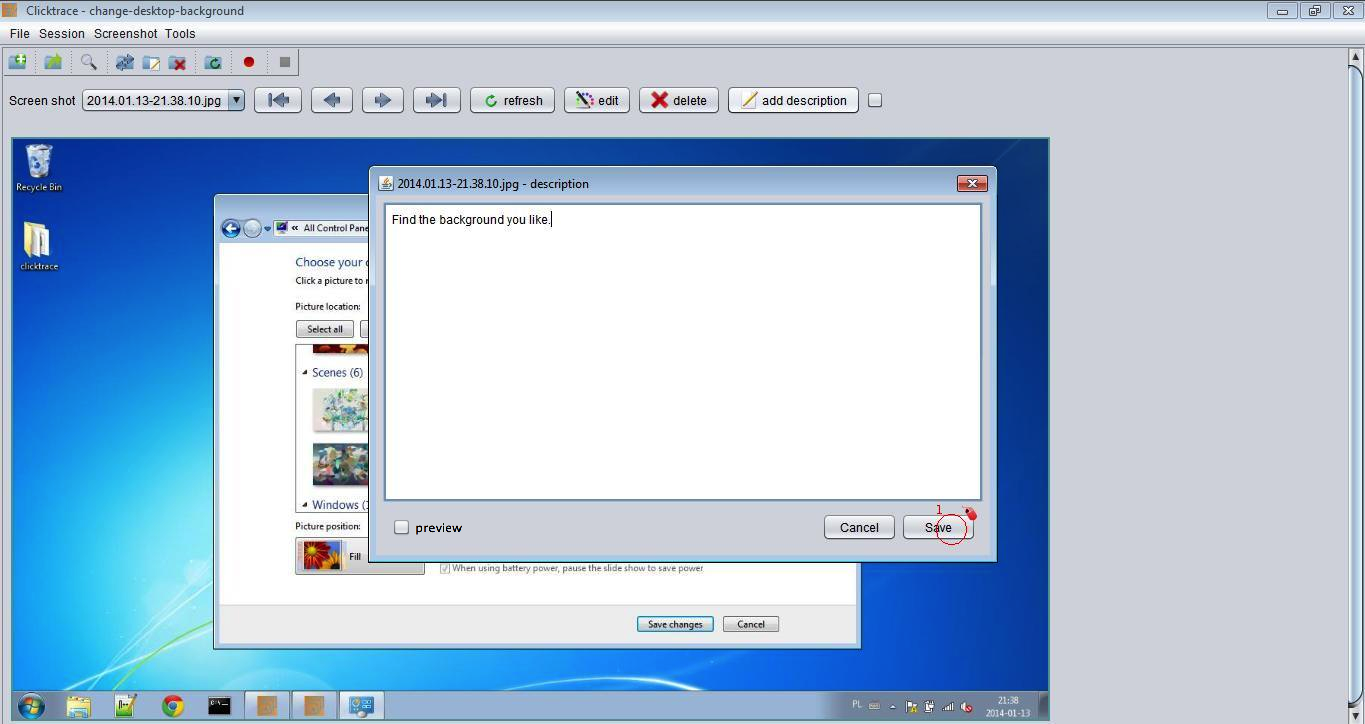
Give a name and description (optional) to start your screen capture session.
The session name is the same as the folder name in which the captured screenshots will be stored.
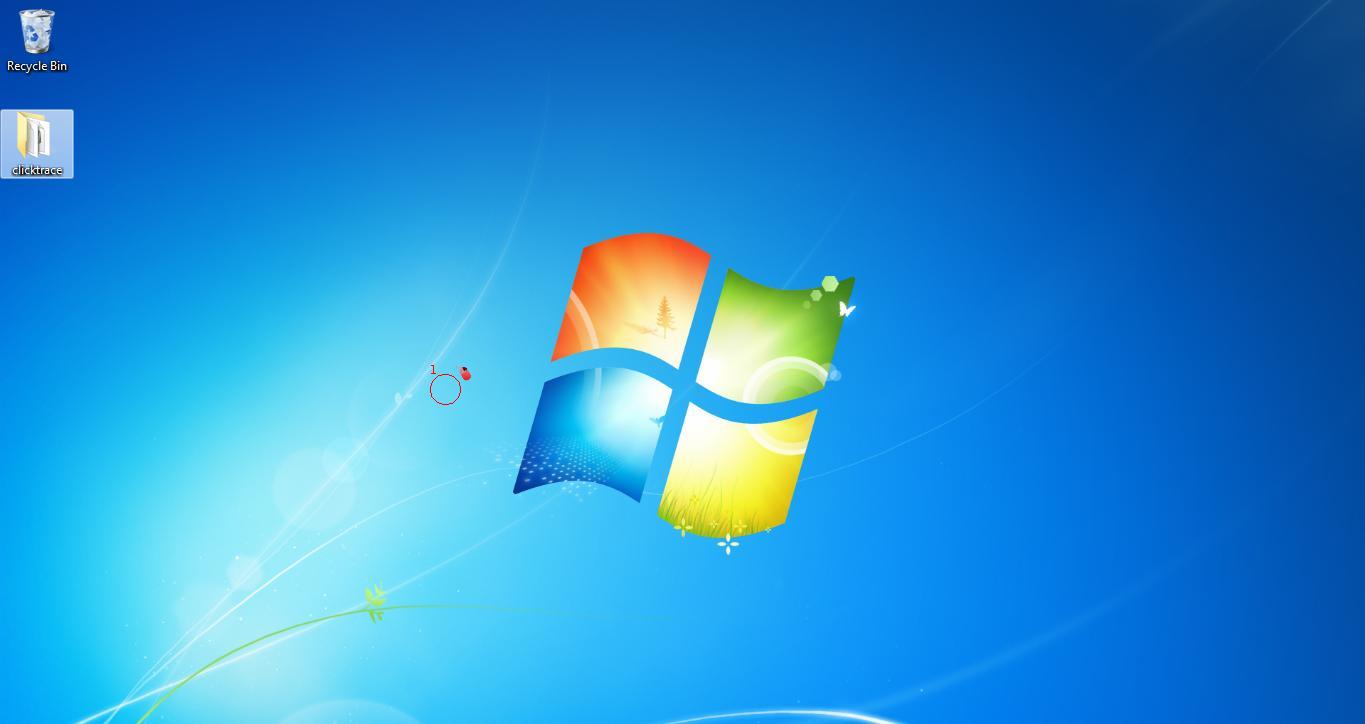
Clicktrace is now recording. We do not need to hurry. It takes screenshots only when it spots a change on the screen (mouse movement is not considered a change).
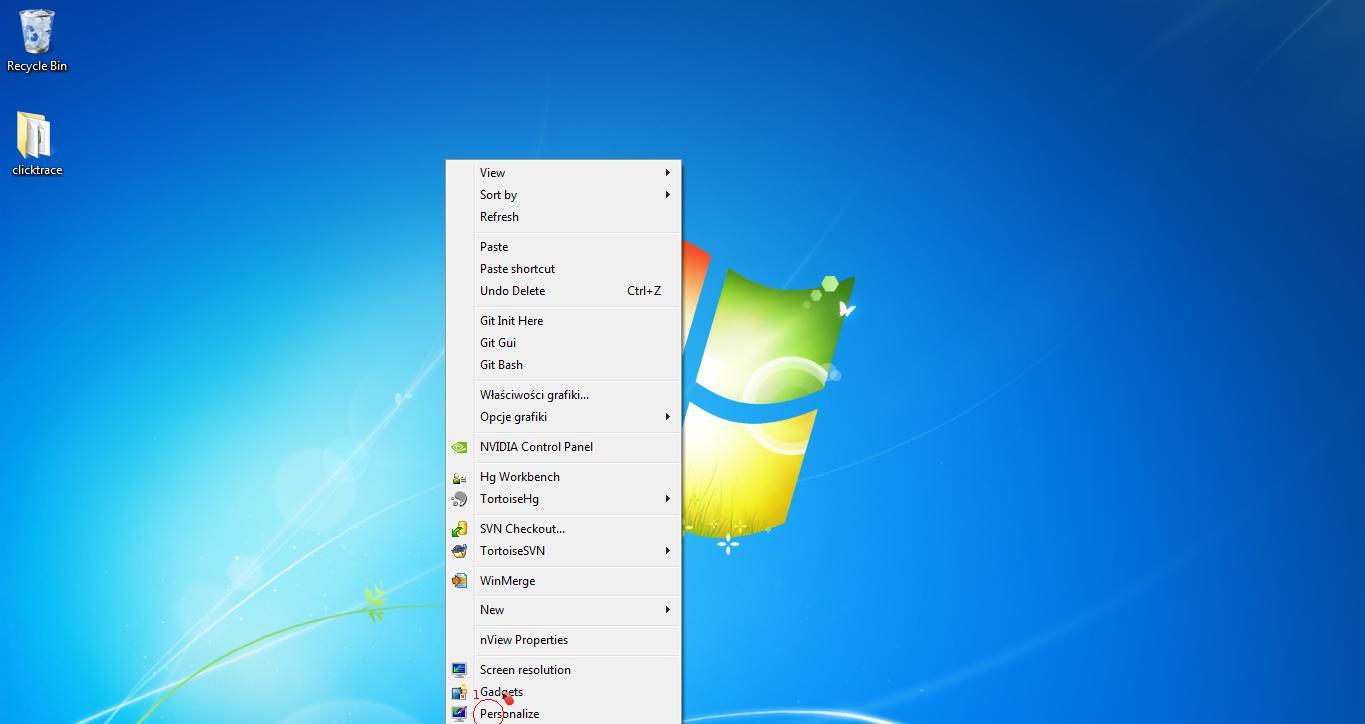
We can now forget about the screenshots and focus on the task. Let's change the desktop wallpaper.
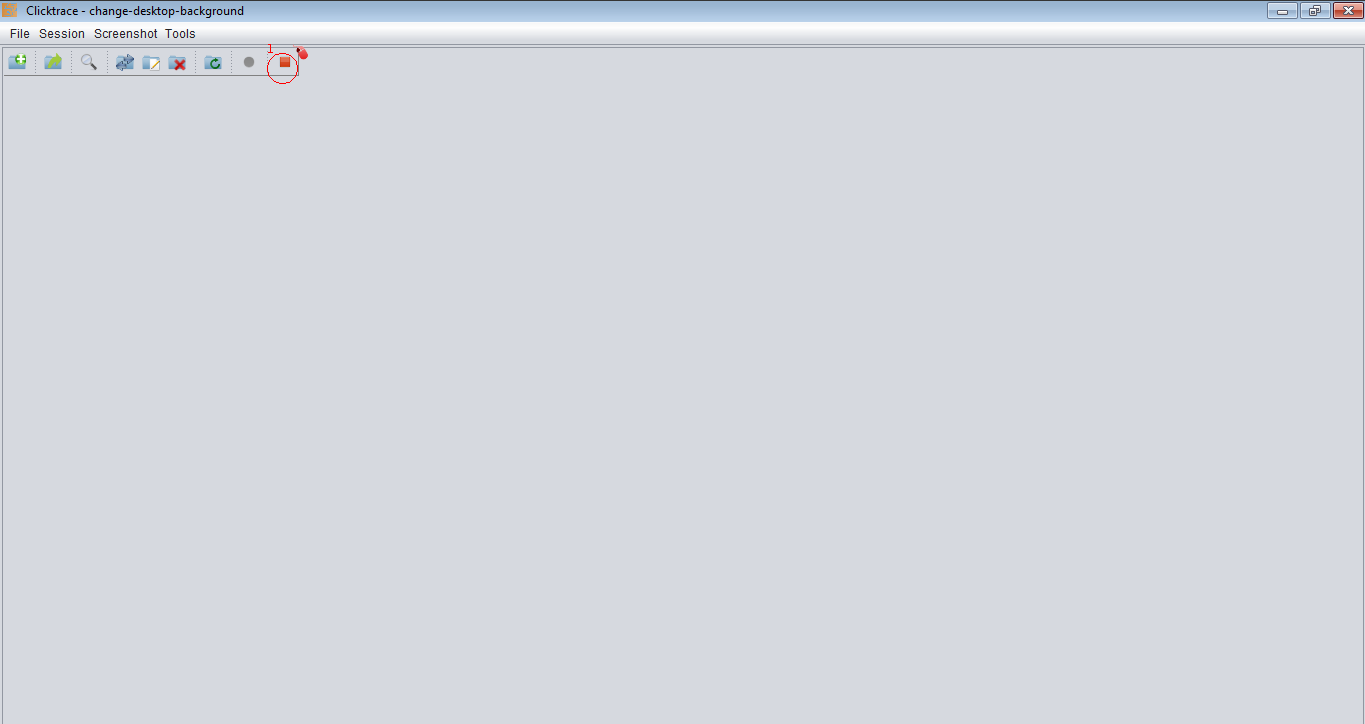
When we are done, we need to stop recording. We may press the "Stop" button or use keyboard shortcut Ctrl+Shift+S.
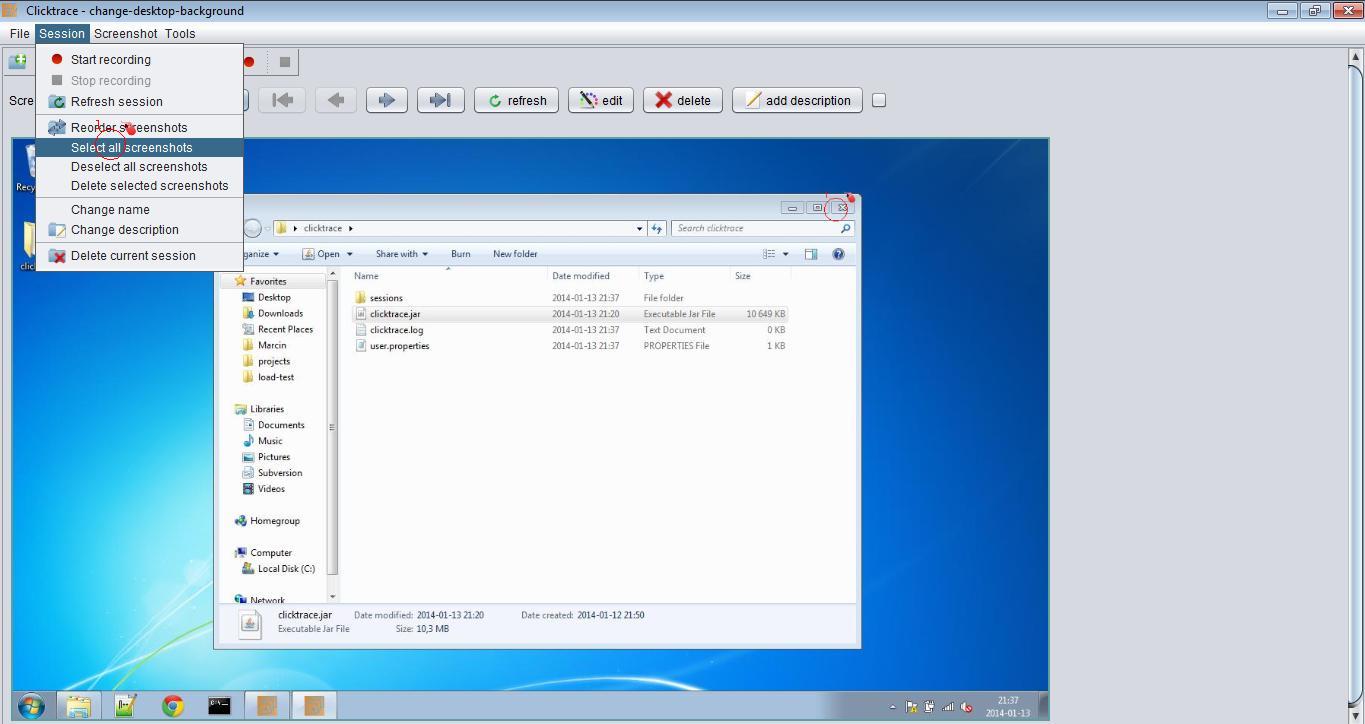
Now it's time to delete the screenshots we do not want to keep in the session.
We will select all screenshots and then unselect the ones we want to keep.
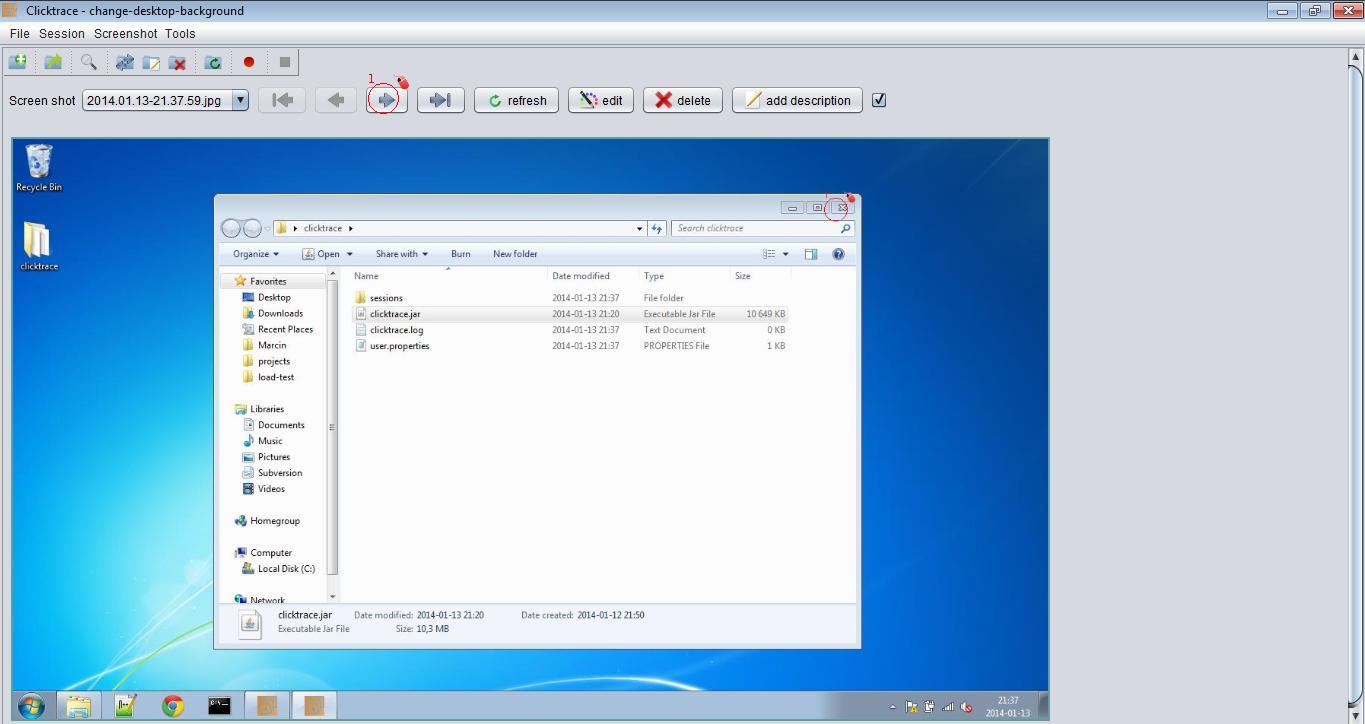
Using navigation buttons or keyboard shortcuts (Ctrl + Left/Right Arrows) we go through all the screenshots.
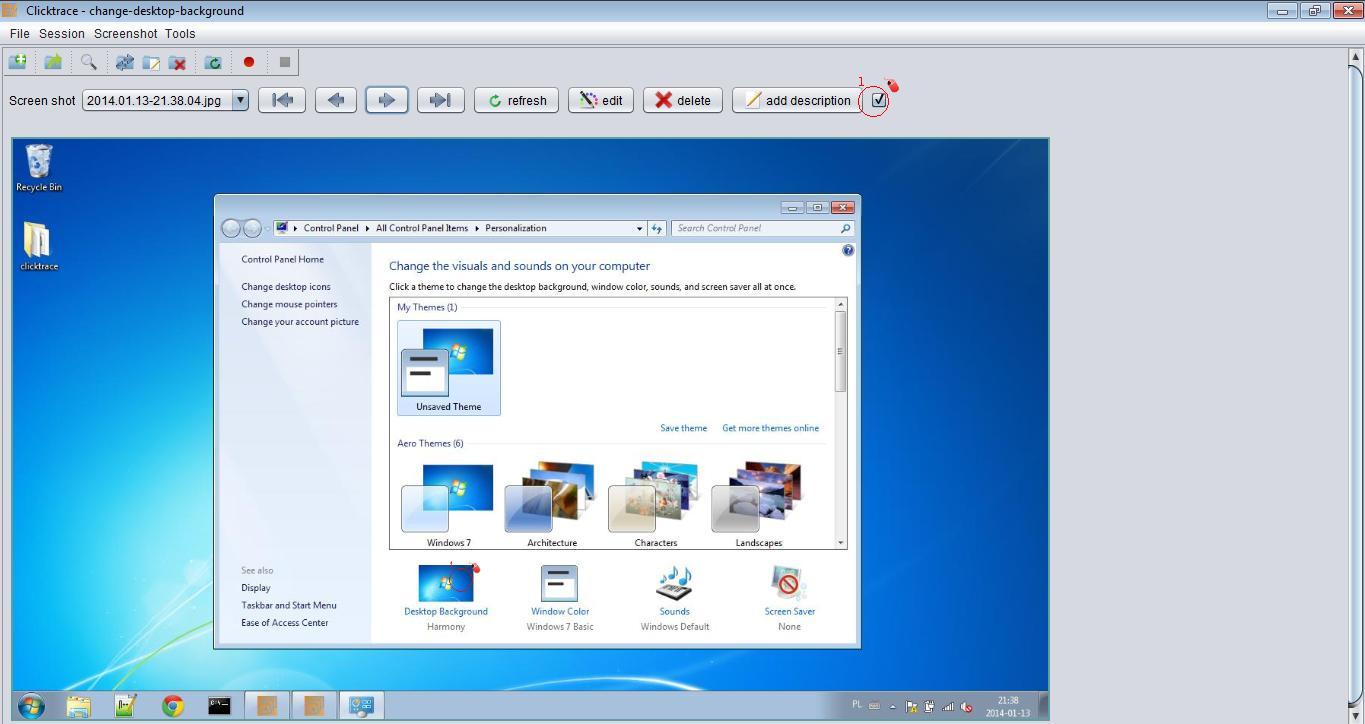
When we find a screenshot we want to keep, we must unselect it by clicking on the checkbox or pressing Ctrl+A.


That's it! We've covered the basic usage of Clicktrace.
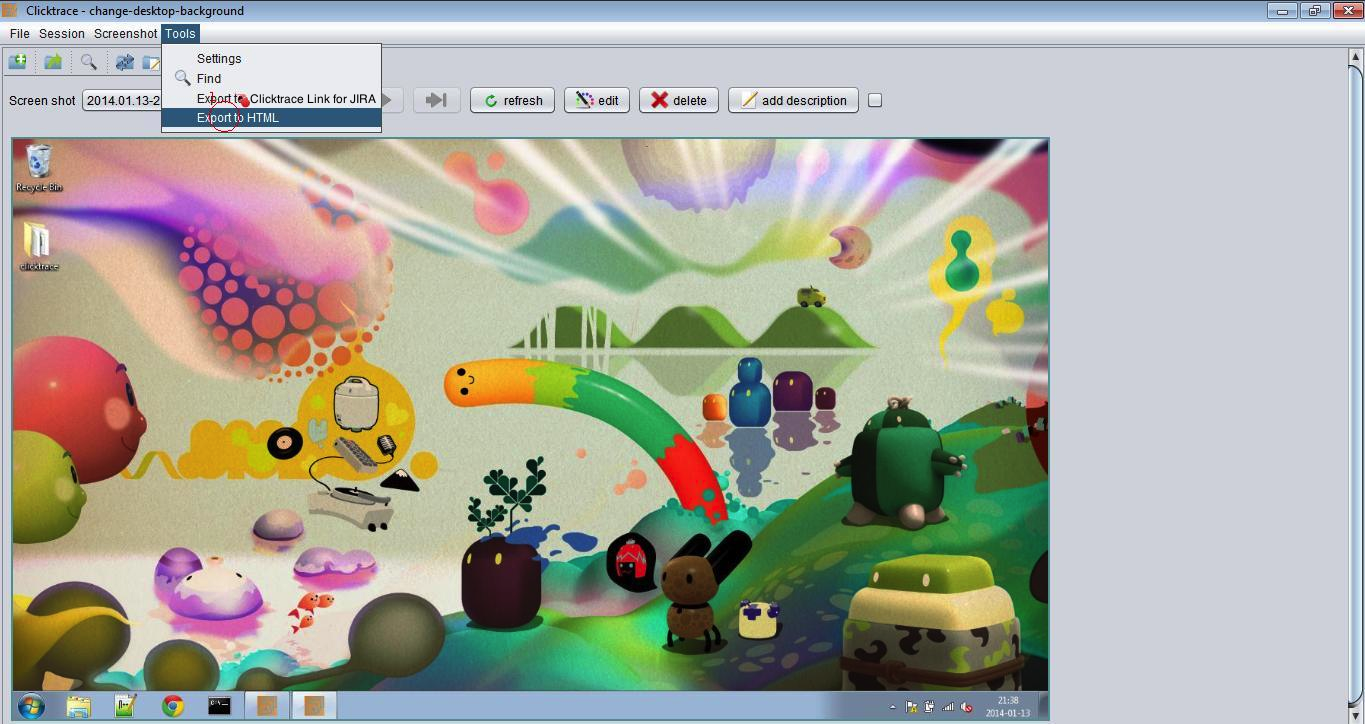
We can now export the session to Clicktrace Link for JIRA or HTML presentation.